
It's a hard and challenging miniature (maxiture), and often, painters need to stop and do something different when painting something like that. This is not an exception. I hope in a couple of weeks more I can say I accomplished this challenge.
Also, sometimes seems that we do nothing, but small details, almost imperceptible, took an incredible amount of time. This is the case this week. But, finally, I could finish the main body and I can focus now on painting spare parts that are easier to handle.

Let's see the steps done:

STEP 91: I glued the final mask's part and painted the base of the Bronzes left. I also had time enough to airbrush the light and shadows.

STEP 92: I outlined the bronze parts using a mixture of Andrea Miniatures matt black + The Army Paintermatt black to paint the shadow ones, and a mixture of @acrylicos Vallejo Ice yellow + ivory to paint the light ones. I also applied some glazes as explained in previous steps
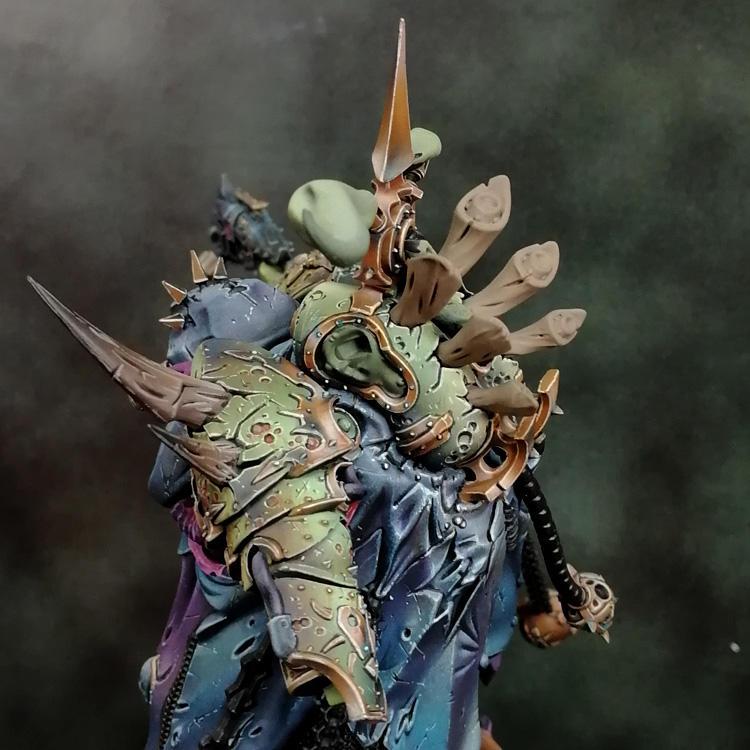
STEP 93: to paint the chimneys on the back I used the same paints as in the horns: a mixture of Acrylicos Vallejo burnt umber + Games Workshopdhenb stone

STEP 94: Also, as in the horns, using Harder & Steenbeck Airbrush I applied shadows to the end withJosonja's Folk Art Studio Inc. carbon black, and lights with @Games workshop khomando khaki

STEP 95: I painted outlines to finish the chimneys.

STEP 96: Using a mixture of Scale 75 sunset purple + Acrylicos Vallejo burnt umber, I gave a basecoat to all "organic" parts left.

Step 97: I painted lights adding slowly Acrylicos Vallejo ivory, and later, some glazes to clean and add dept mixing base with Acrylicos Vallejo dark sea blue.

STEP 98: I started to paint the chainmail in NMM with a mixture of Games Workshop Adeptus Battlegrey + Andrea Miniatures matt black, and adding slowly @Acrylicos Vallejo Ivory, one by one.

STEP 99: it's slow work, but placing a slightly light in the middle of each one we can get a simple but effective No Metallic Metal effect.

STEP 100: To paint chains I gave a basecoat ofGames Workshop adeptus battlegrey and before doing anything else, I protect the closer work done with a transparent film.

STEP 101: using Harder & Steenbeck Airbrush andJosonja's Folk Art Studio Inc. carbon black & titanium white, I sketched the lights and shadows and removed the film.

STEP 102: With brush, I finished lights & shadows and painted outlines. It's a simple NMM, but it works. Later I'll decide if I need to add some rust effects.

STEP 103: To paint upper smoke, I decided to go with a colour very close to the skirt. I choose to go with a darker mixture of Scale 75 sunset purple + @acrylicos Vallejo burnt umber + black

STEP 104: I sketched with dry pointing the lights adding Games Workshop kommando khaki

STEP 105: Using Harder & Steenbeck Airbrush and first, Scale 75 sunset purple, and later Jo Sonja's UK carbon black, Y cleaned the previous step and painted the tip in black.

STEP 106: Some small details to finish the main body, like seams, and we can say the hardest piece is finished!
No hay comentarios:
Publicar un comentario
Nota: solo los miembros de este blog pueden publicar comentarios.